Skip to end of metadata
Go to start of metadata
You are viewing an old version of this page. View the current version.
Compare with Current
View Page History
« Previous
Version 8
Overview
How To Create Profile
|
|
|---|
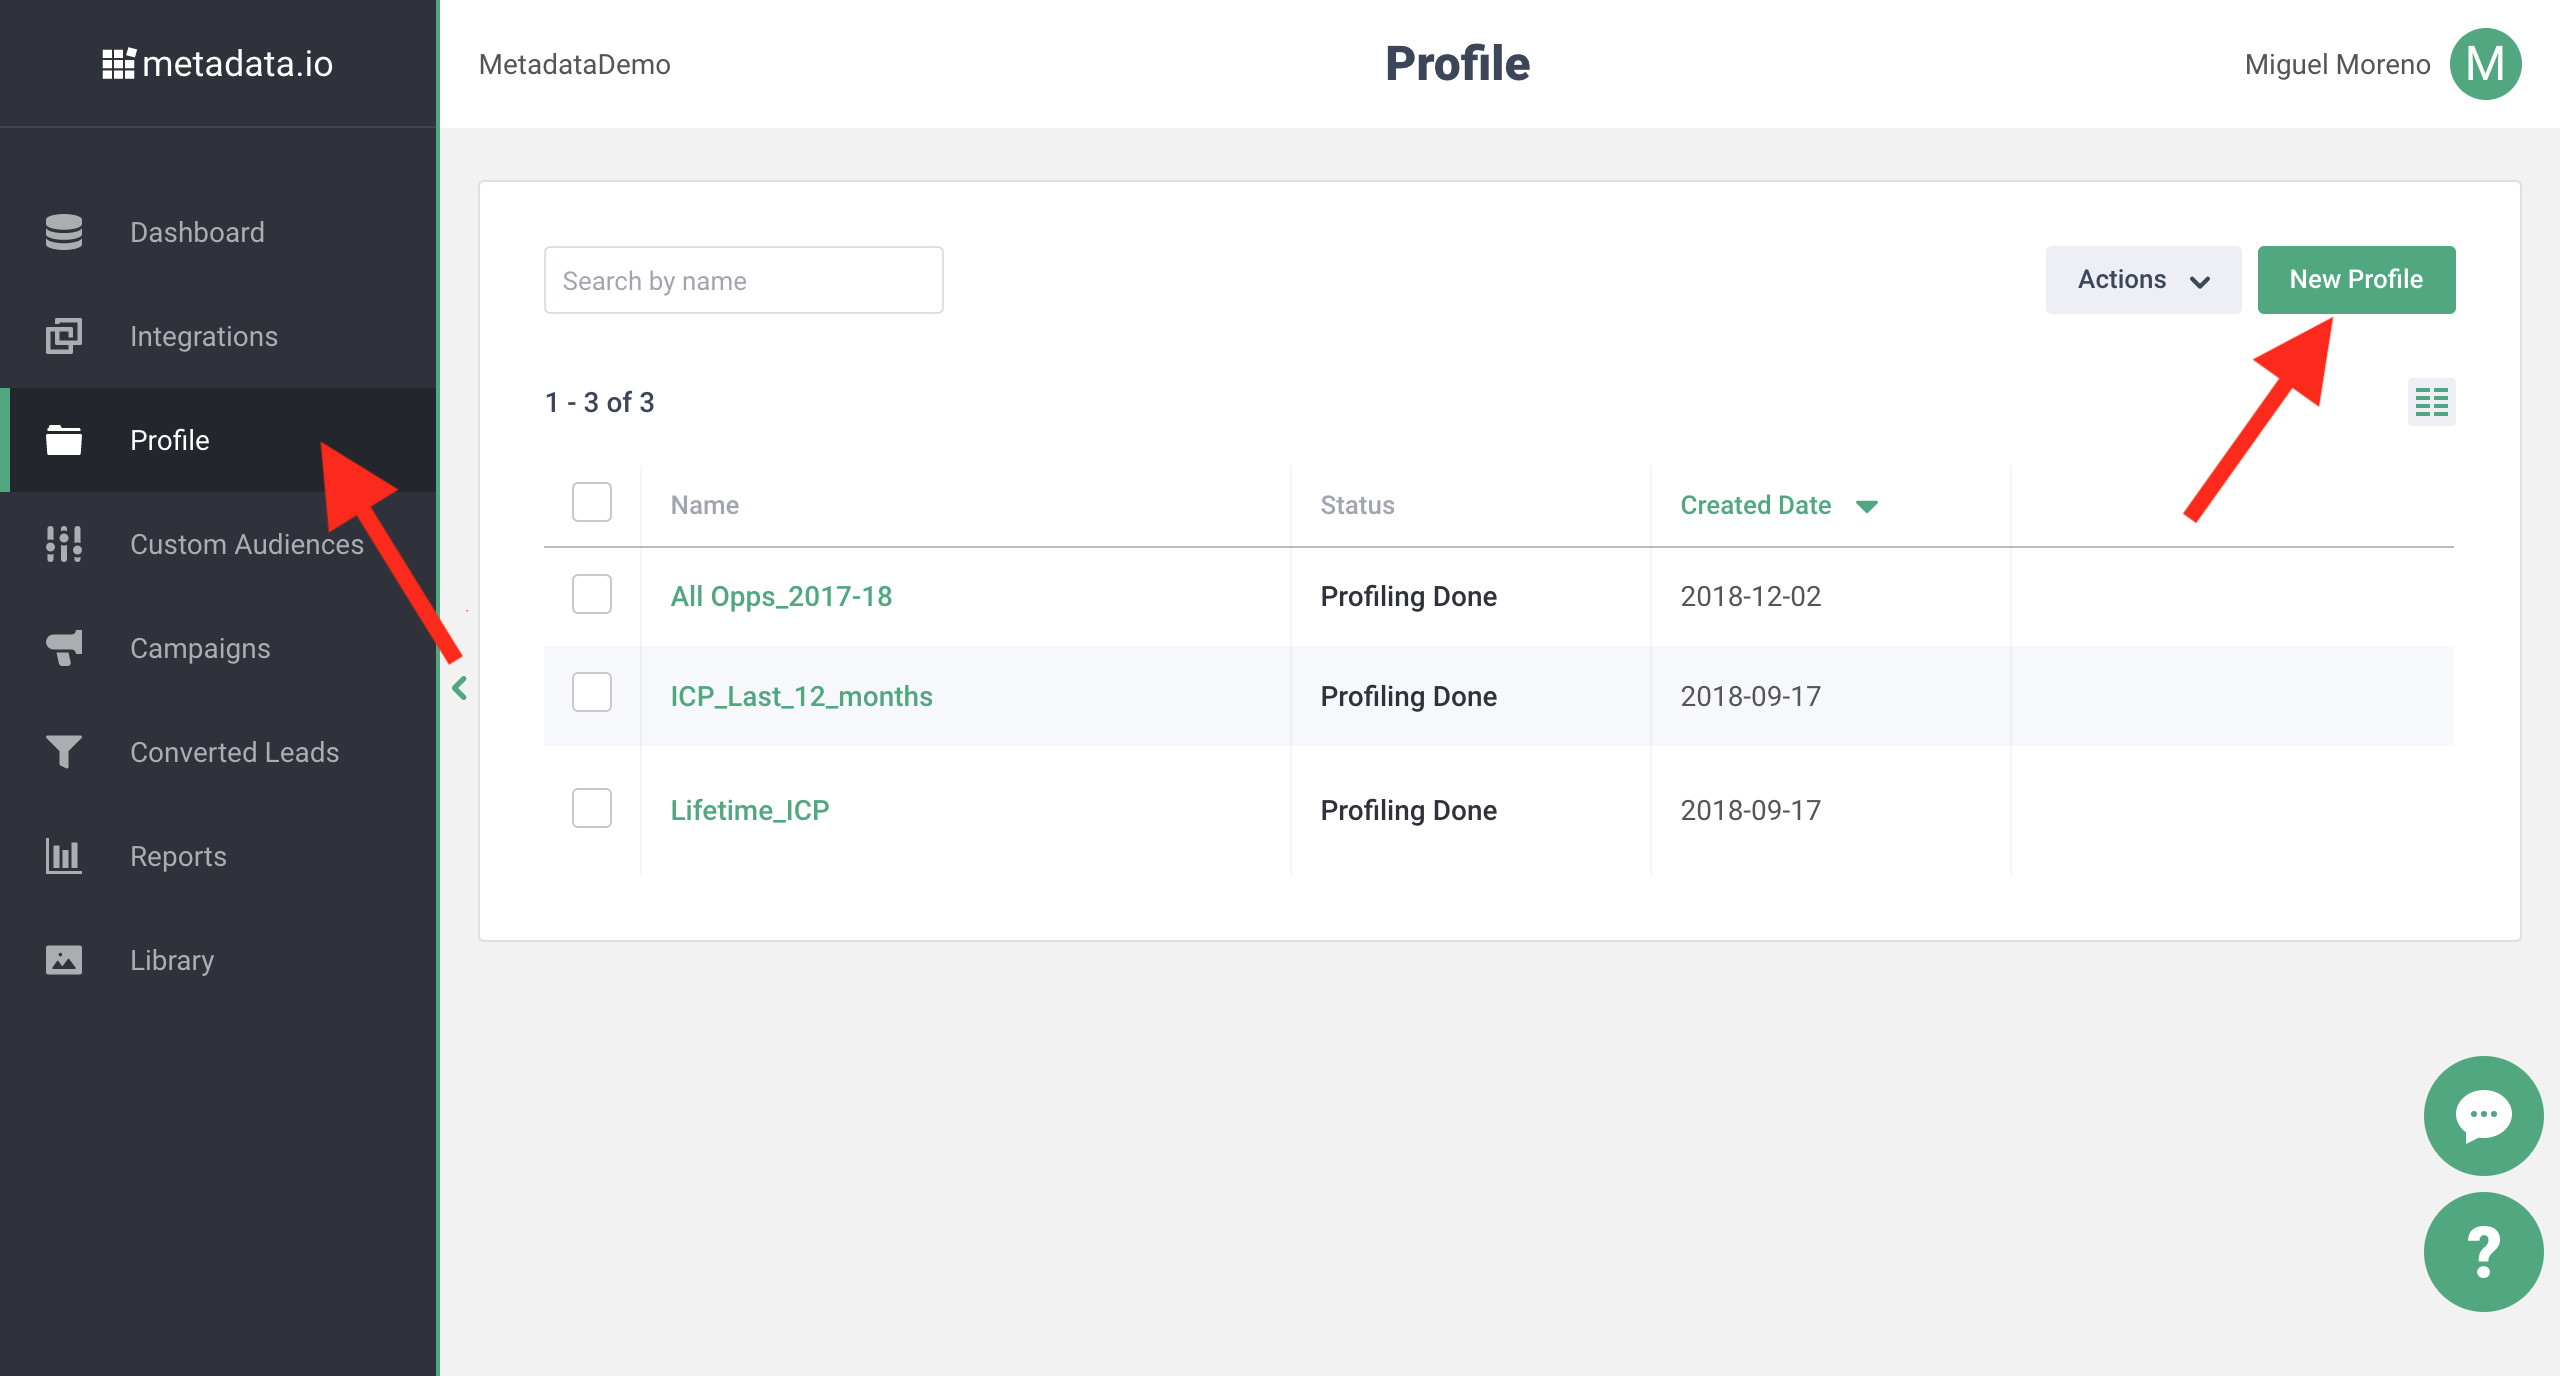
| STEP 1 - Navigate to Profile PageThere are two ways to create an Ideal Customer Profile: Salesforce Import or CSV Upload. To create a Profile, navigate to the Profile tab in the left column and select New Profile on the main dashboard screen. |
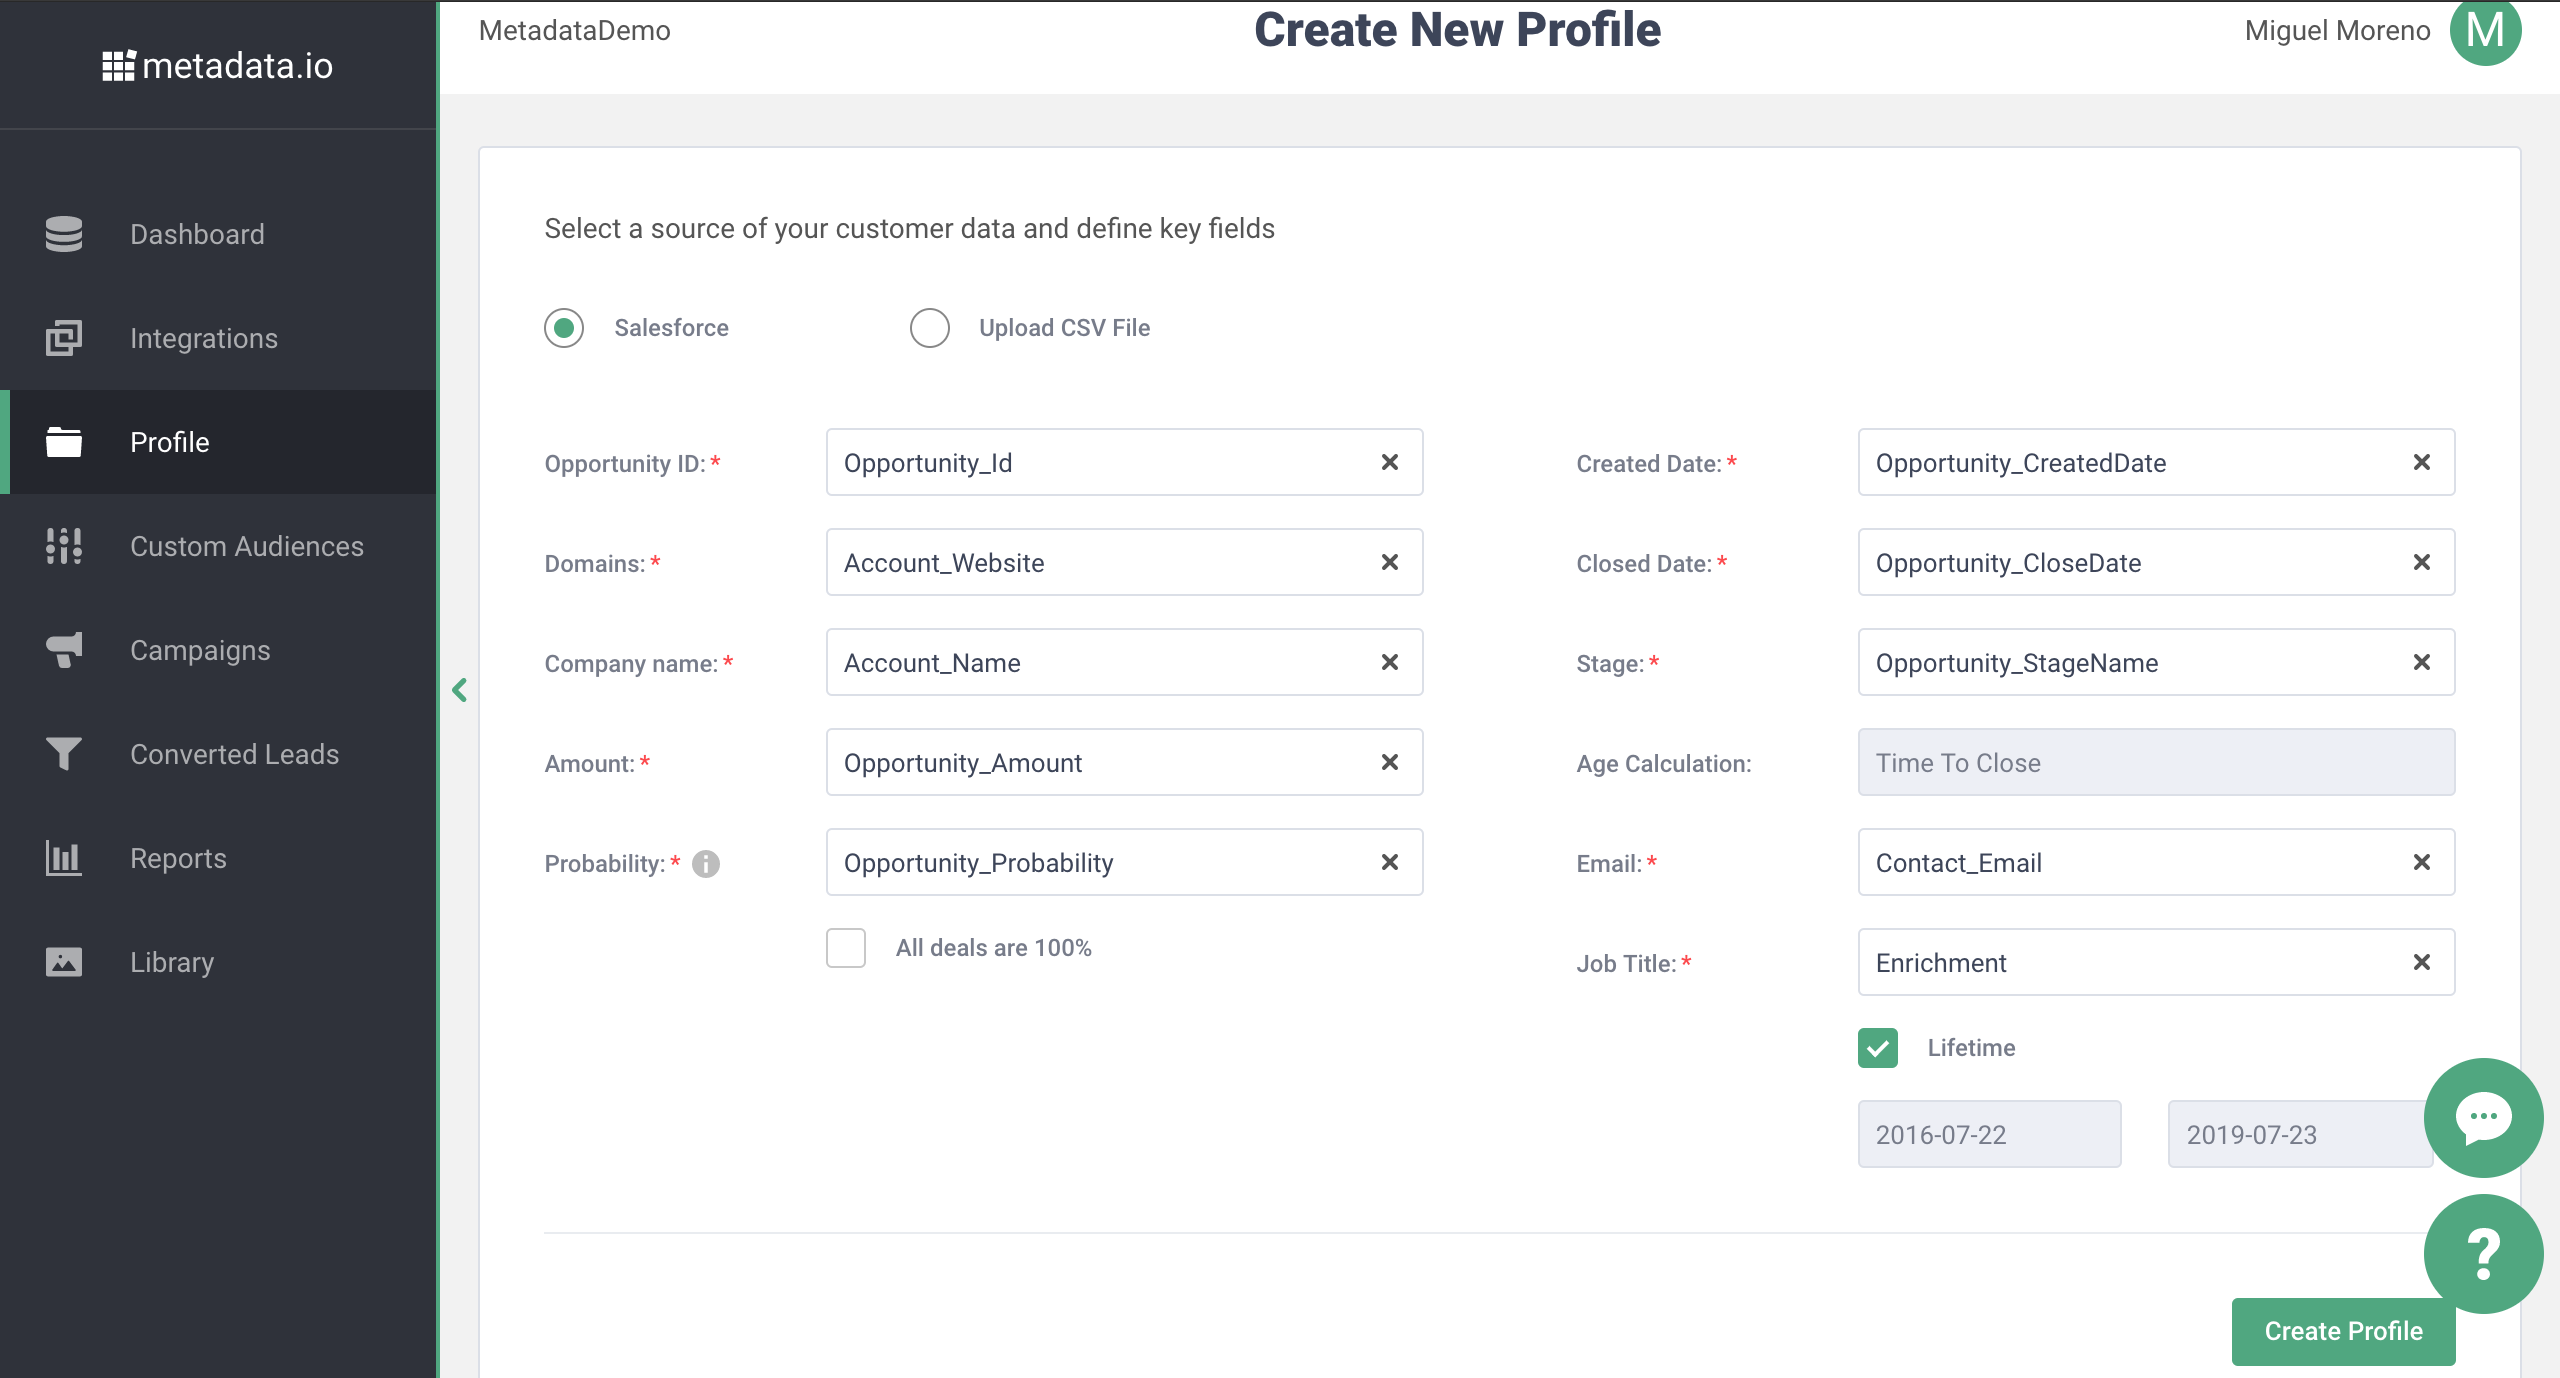
| STEP 2A - Salesforce Integration- If your Salesforce Opportunity, Account, and Contact fields were not customized by your Salesforce admin, all fields will be auto-matched. If you want to check to make sure that the correct fields are matched, head to the Accounts > Fields setup page on your Salesforce Account.
- If your organization does not use any % criteria to mark an 'Opportunity Probability', the 'All Deals are 100%' box should be checked.
- Choose the date range for enrichment, if you have a large quantity of data in your Salesforce database, we recommend you set the date range for the last 12 months to start. You can later test multiple Profiles using varying date ranges.
|
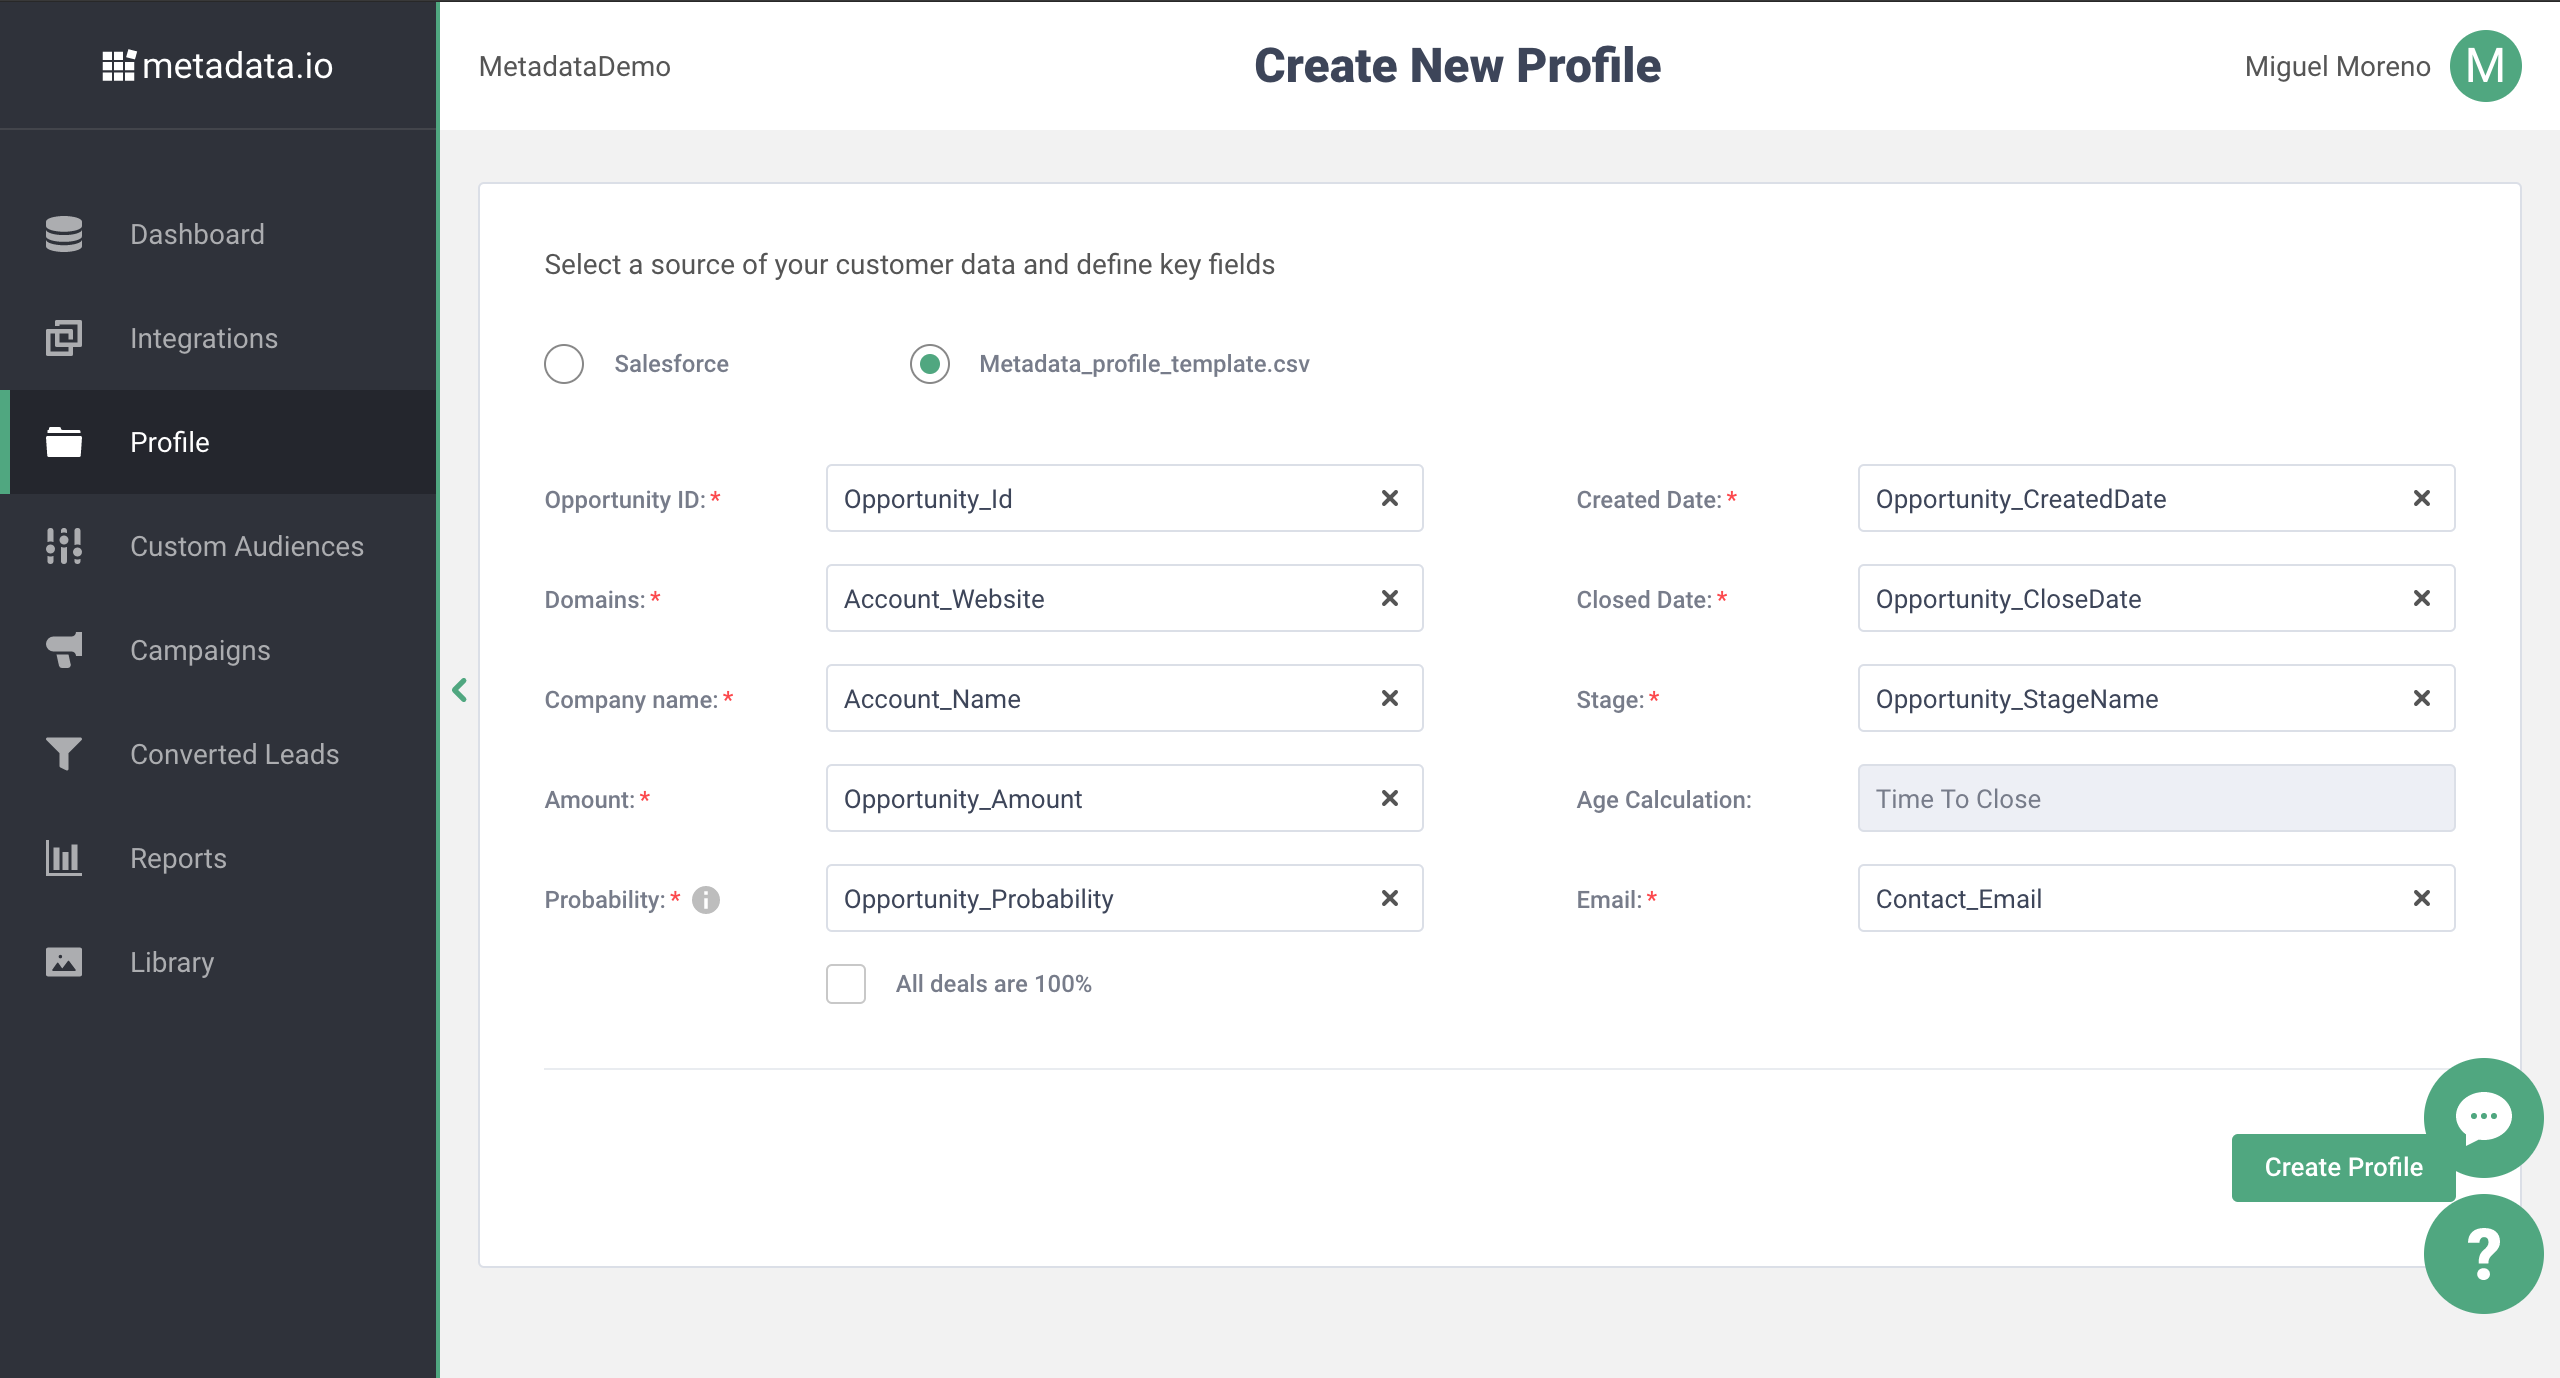
| STEP 2B - Upload File- Download the Metadata SSP - Profile CSV Template as a .csv file.
- Populate the columns with appropriate data from your CRM database. Columns: Opportunity_Id, Account_Name, Account_Website, Opportunity_Amount, Contact_Email, Opportunity_Probability, Opportunity_CloseDate, and Opportunity_CreatedDate.
- Save your file as a .csv, go to the Profile tab on the SSP, click New Profile and select 'Import File'.
- Click 'Select File' and upload the .csv file.
- Match the fields to the related columns on your spreadsheet.
- If your organization does not use any % criteria to mark an 'Opportunity Probability', the 'All Deals are 100%' box should be checked.
- Choose the date range for enrichment, if you have a large quantity of data in your .csv, we recommend you set the date range for the last 12 months to start. You can later test multiple Profiles using varying date ranges.
- Lastly, click 'Enrich', and give the Profile a unique name.
|
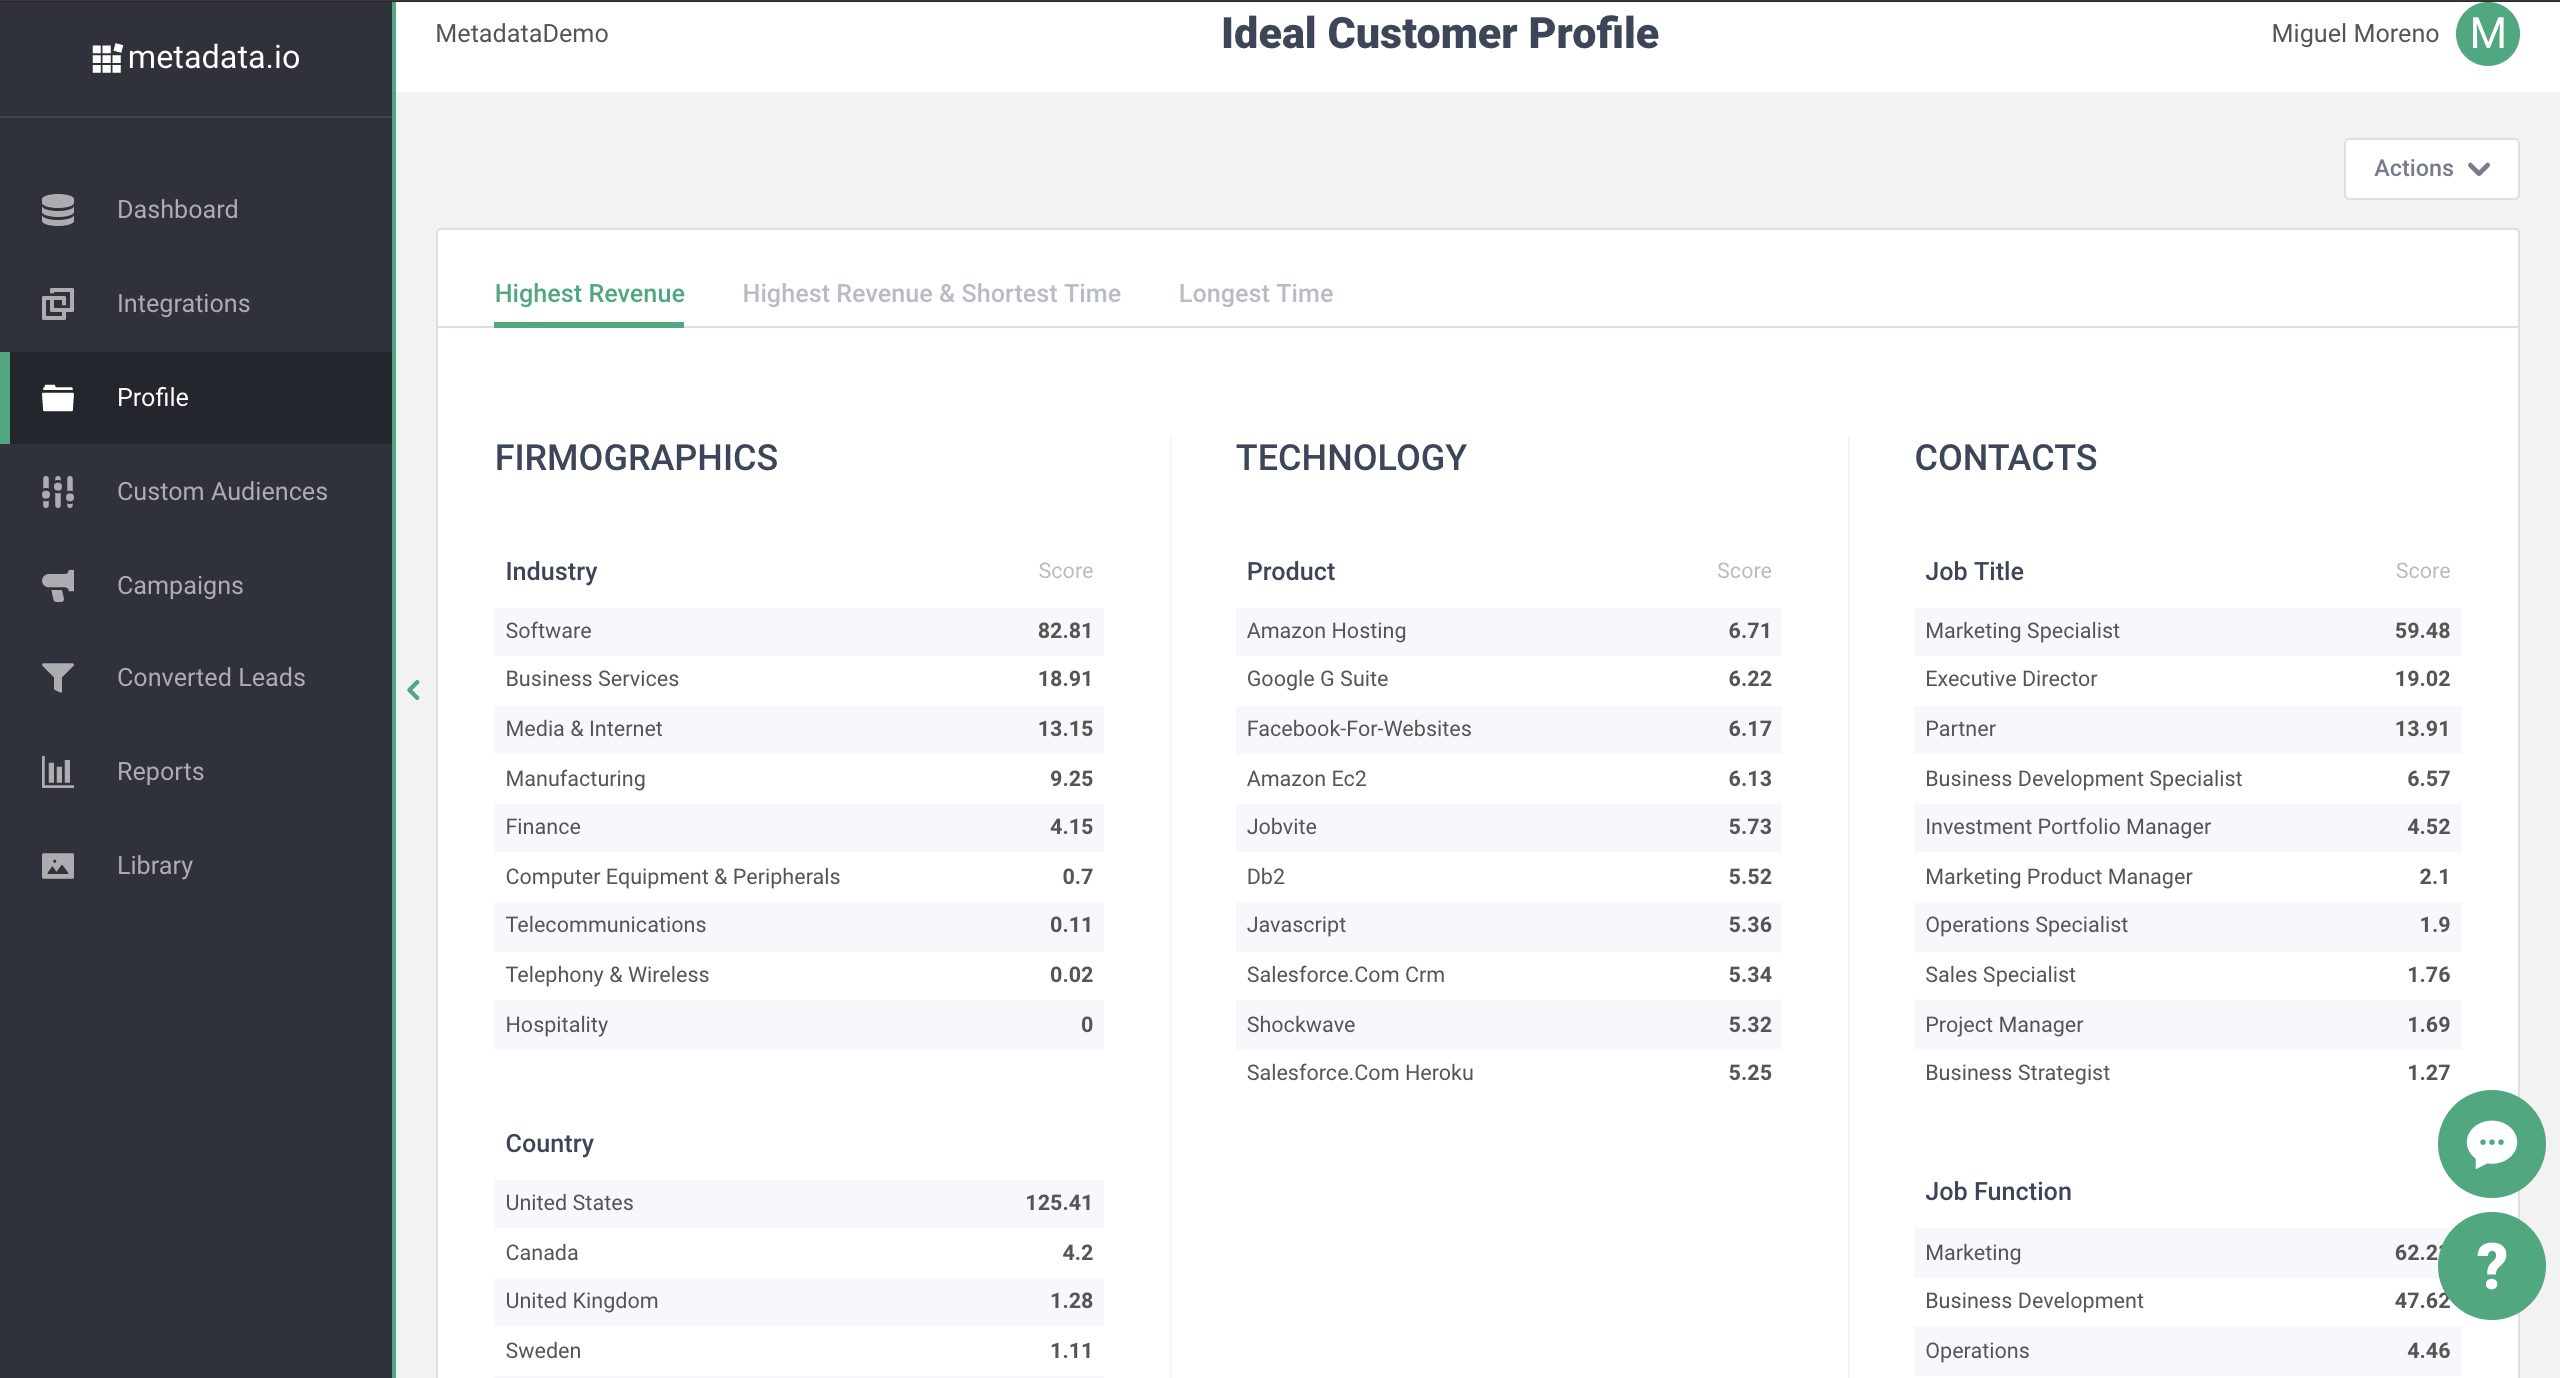
| STEP 3 - View New Profile - You will be notified when the Profile results are ready to be reviewed.
|
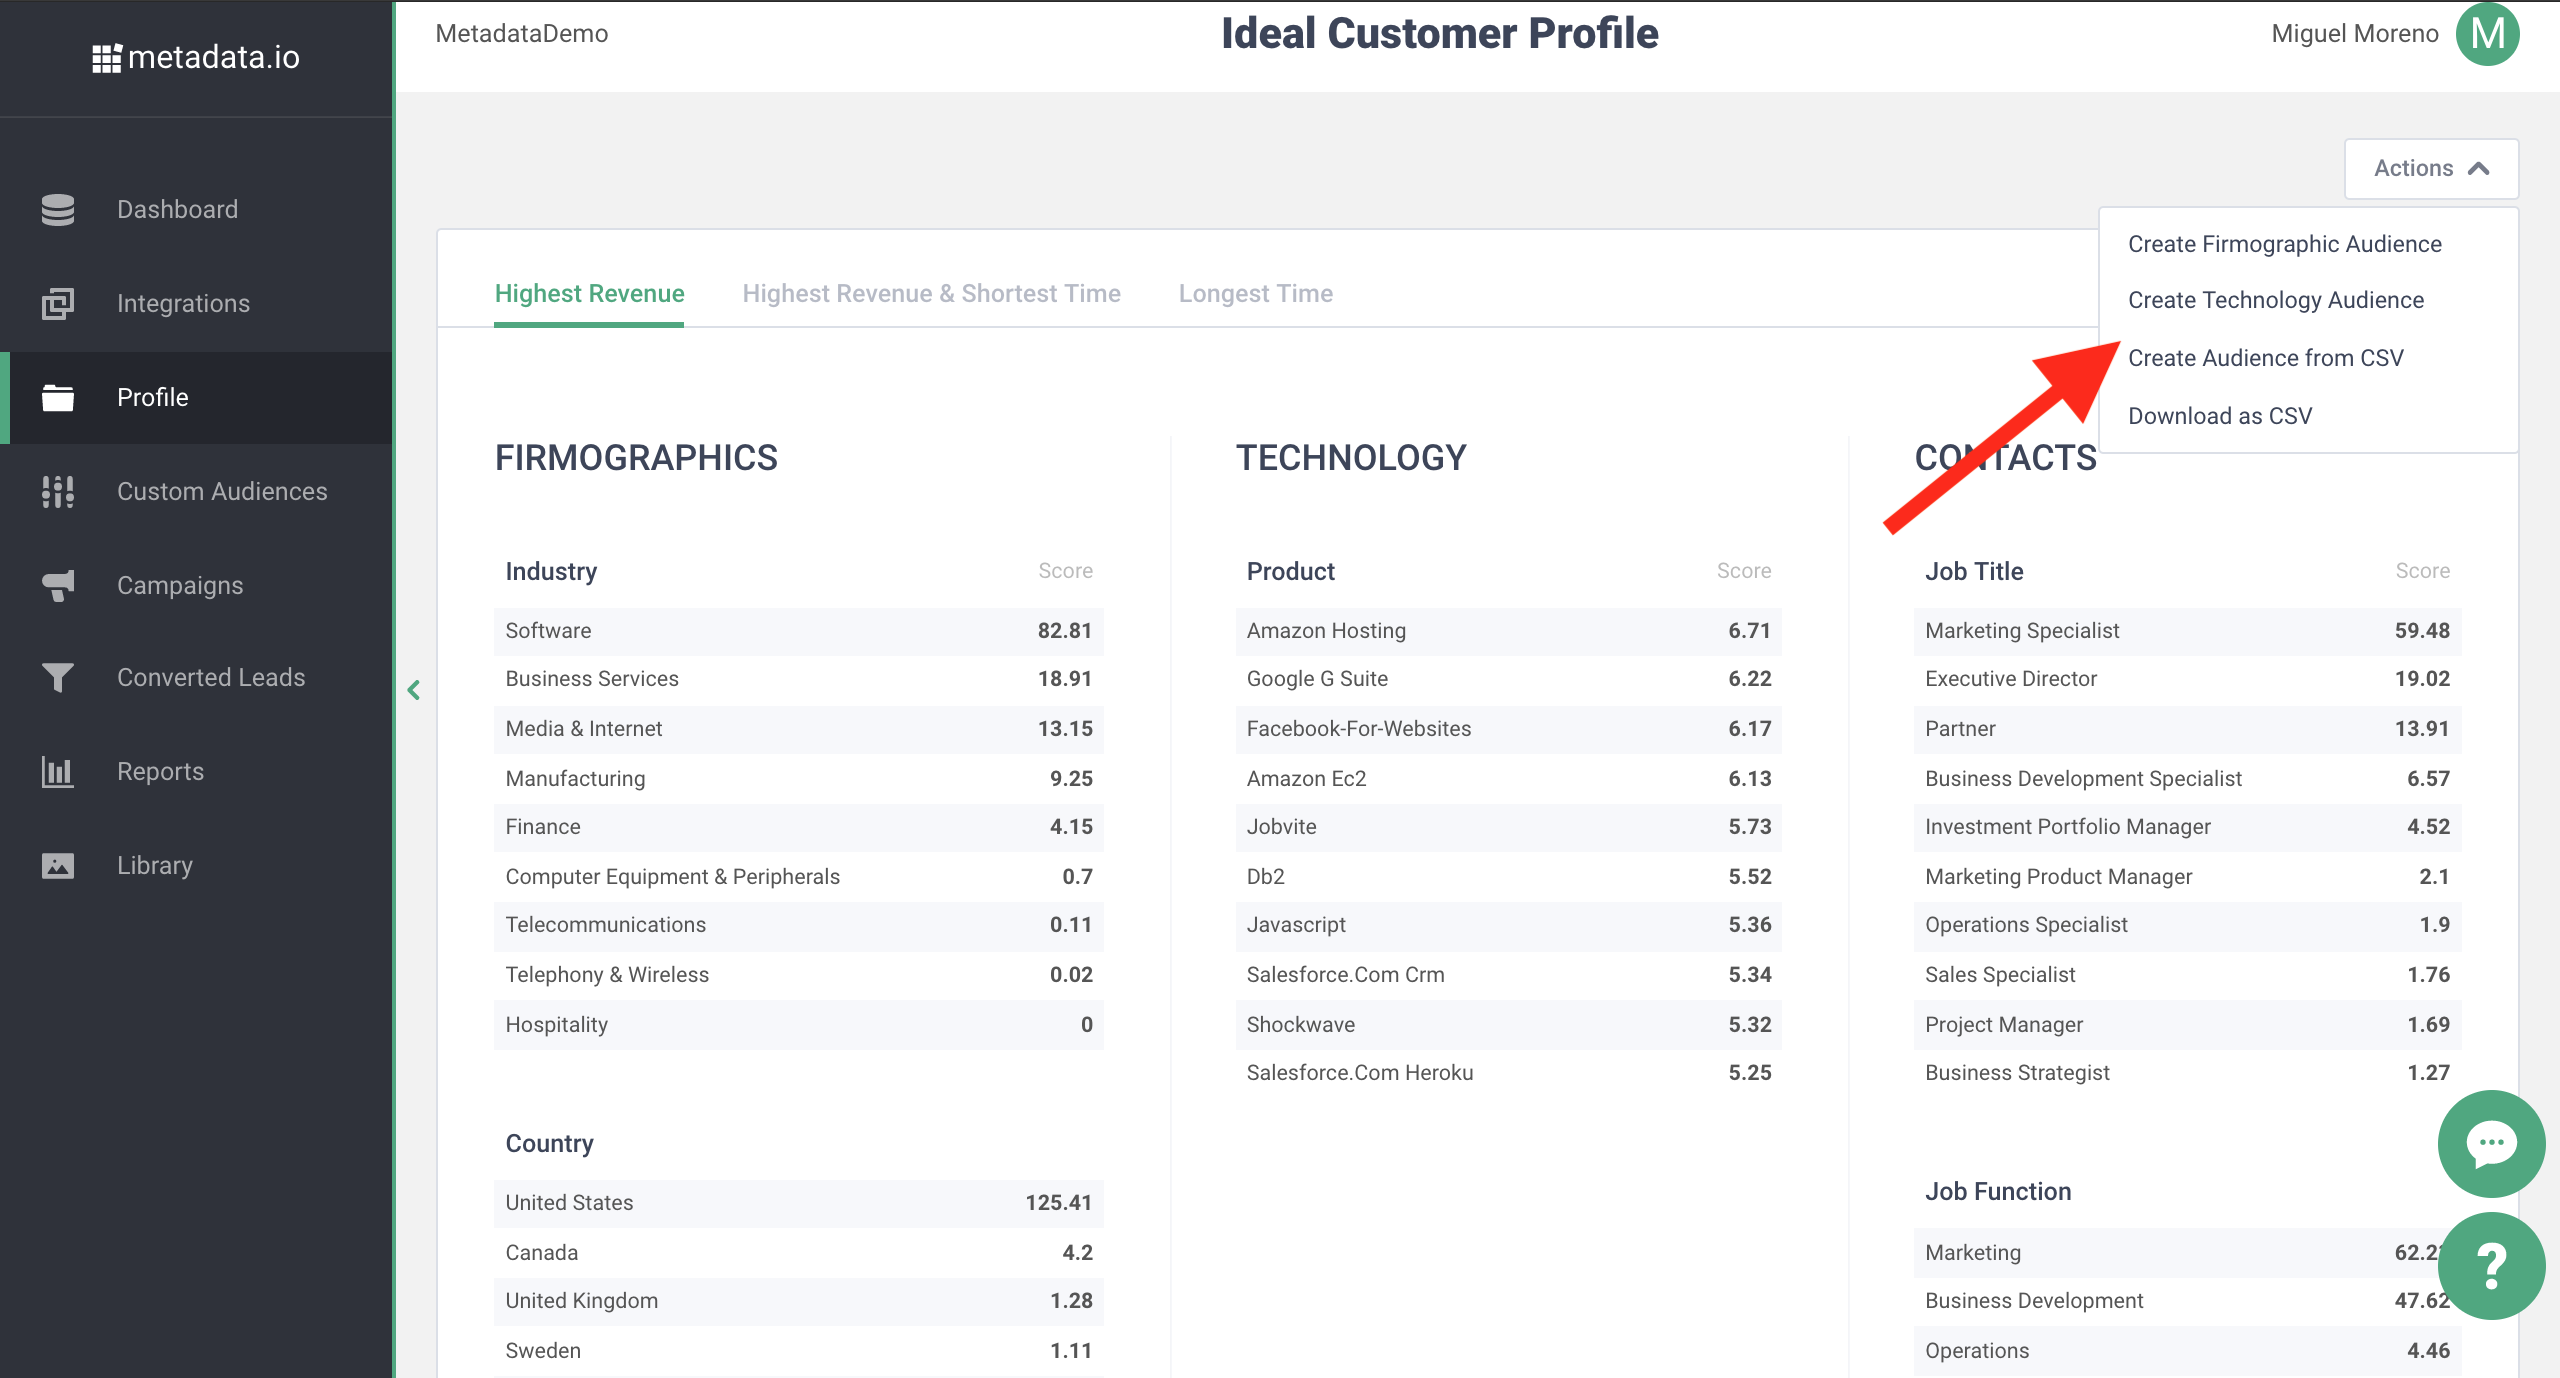
| STEP 4 - Create a Custom Audience from ICP
|